
Overview of Scheduling Features and Settings
SigmaMD gives you flexible tools to manage your clinic’s schedule—whether you offer in-person visits, virtual appointments, or at-home care. This guide covers how to set up appointment types, manage clinician availability, and use the calendar to coordinate care smoothly.
Appointment Settings
Scheduling settings live in Practice Settings > Scheduling, which is split into four tabs: Calendars, Appointment types, Appointment settings and Resources. The Appointment settings tab includes settings for:
Visit Types
Choose the available methods for events in your calendar: In-Clinic, Video, Phone, or At-Home.
You can also choose whether or not to display the clinic's address in the patient's app.

Appointment Statuses
By default, SigmaMD provides the following status:
- Archived
- Booked
- Canceled
- Checked in
- Checked out
- Completed
- Confirmed
- No show
You can also create your custom statuses. Click on 'Add appointment status', give it a name and save.

Appointment Types
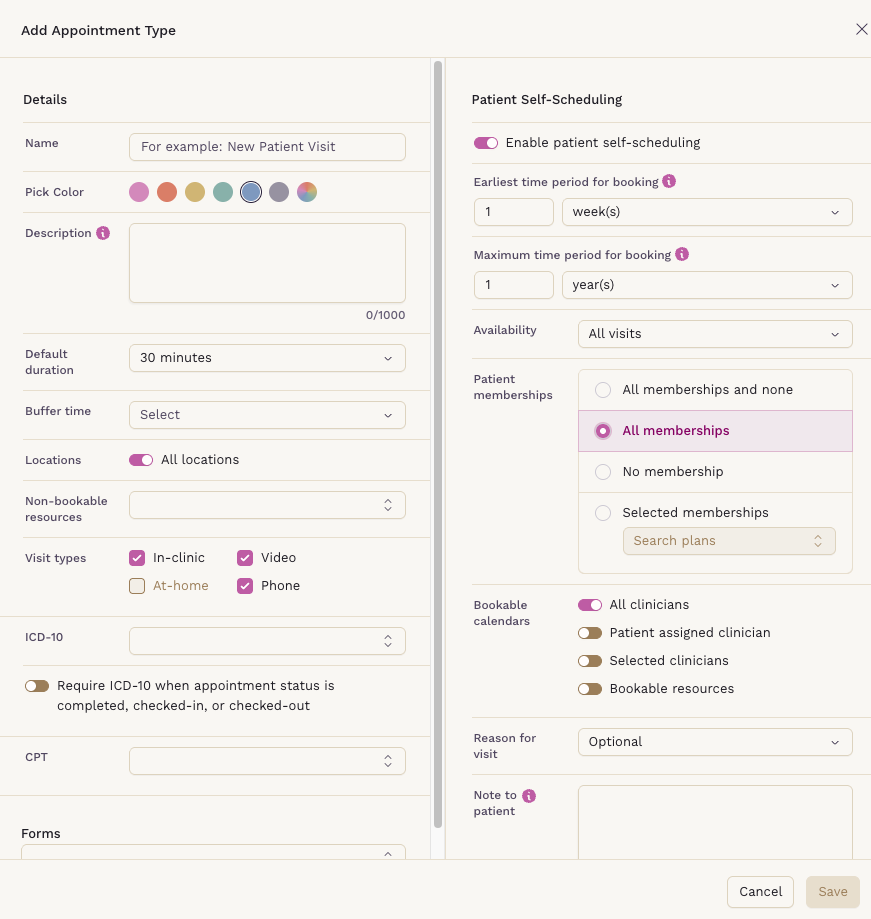
Appointment types have their own tab, in Practice Settings > Scheduling > Appointment types. Organize your visits and speed up scheduling by creating custom appointment types. The available options are:
- Details
- Name: Will be shown on the calendar and will be seen by the patient as well.
- Color: Shown on the calendar.
- Description: An internal note, not viewed by patients.
- Default duration: The duration of the event when created. Can be changed later for each event.
- Buffer time: An extra time added to the calendar after the event duration.
- Non-bookable resources: Rooms and equipments that will be used on the event, but that patients cannot book directly.
- Visit types: From the available visit types (see above), choose which ones can be applied to this event.
- CPT Code: Helpful for later reporting.
- Forms: Linked forms are automatically assigned whenever this appointment type is booked. Turn on Exclude previously completed forms to leave out any linked form the patient has already submitted.
- Patient Self-Scheduling
- Enable patient self-scheduling: Choose if patients can schedule this appointment from their SigmaMD Patient App.
- Earliest scheduling period: Set the earliest time a patient can schedule an appointment. E.g. 'one week from today.'
- Latest scheduling period: Set how far in advance a patient can schedule an appointment. E.g. 'Up to one year in advance.'
- Availability: Appointment availability for self-scheduling depends on the appointment type’s availability setting and the patient’s past appointments.
- All visits:
- The appointment type is always available to the patient, regardless of past appointments.
- First visit only:
- Available only if the patient has no prior appointments. Appointments with a status of Archived, Canceled, or No show are not considered prior appointments.
- Imported patients from the practice's previous EMR are excluded, even if they have no appointments in SigmaMD.
- After first visit only:
- Available only if the patient has at least one prior appointment. Appointments with a status of Archived, Canceled, or No show are not considered prior appointments.
- Imported patients are treated as existing patients, reflecting their prior relationship with the practice before being imported into SigmaMD.
- All visits:
- Daily limit: Turn on Max appointments per day per location and enter a number from 1 to 99. Once a location reaches that many appointments of this type in a day, patients can no longer self-schedule it there on that day. Appointments your team books count toward the limit; Canceled, No show and Archived ones don't. Your team can still book past the limit from the calendar. Available only when self-scheduling is enabled.
- Patient memberships: Create a filter based on the patient's membership
- All memberships and none: All patients can book this appointment type.
- All memberships: Only patients with an active or paused membership can book it, retail or employer.
- No membership: Only patients not enrolled on active or paused memberships can book it.
- Selected memberships: Choose one or more plans the patient must be enrolled with in order to schedule this appointment type.
- Bookable calendars: When self-scheduling, the patient can choose a clinician to book. On this field pick the option patients will have when trying to schedule this appointment type. Turn on Bookable resources to let patients book a resource—a room, a piece of equipment, or any bookable space—instead of a clinician.
- Reason for visit: Set whether patients must text the reason for the appointment when self-scheduling; options are Optional or Required.
- Note to patient: Add a note that will be seen by patients when scheduling. Tips: select a text to format it or add links.
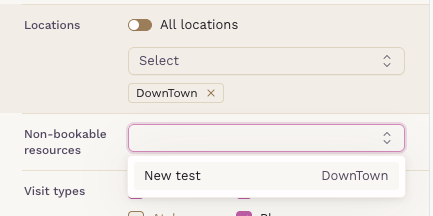
If your practice has multiple locations, you can also restrict appointment types to specific locations. After selecting a location, non-bookable resources are automatically filtered accordingly.
Practice Calendars
Resources and team members can each have their own bookable calendar, managed in Practice Settings > Scheduling > Calendars. A practice calendar carries its own:
- Availability, by day of the week or by custom dates
- Assigned location, so multi-location practices stay separate
- Overlapping appointments setting, with a maximum per slot
- Booking notification recipients

Events are booked against these calendars, so the room, the equipment and the clinician are all reserved in a single step.
Clinician Availability
To manage clinicians' working hours, go to Practice Settings > Scheduling > Calendar, and select the member you want to manage.
- Set working hours for each day.
- Define the location where they’ll be working during that time (for multi-location practices)
- Add shifts, breaks, and out-of-office periods.
- Select available appointment types and visit methods for each shift.
This controls when a clinician is available in the calendar and for patient self-scheduling.
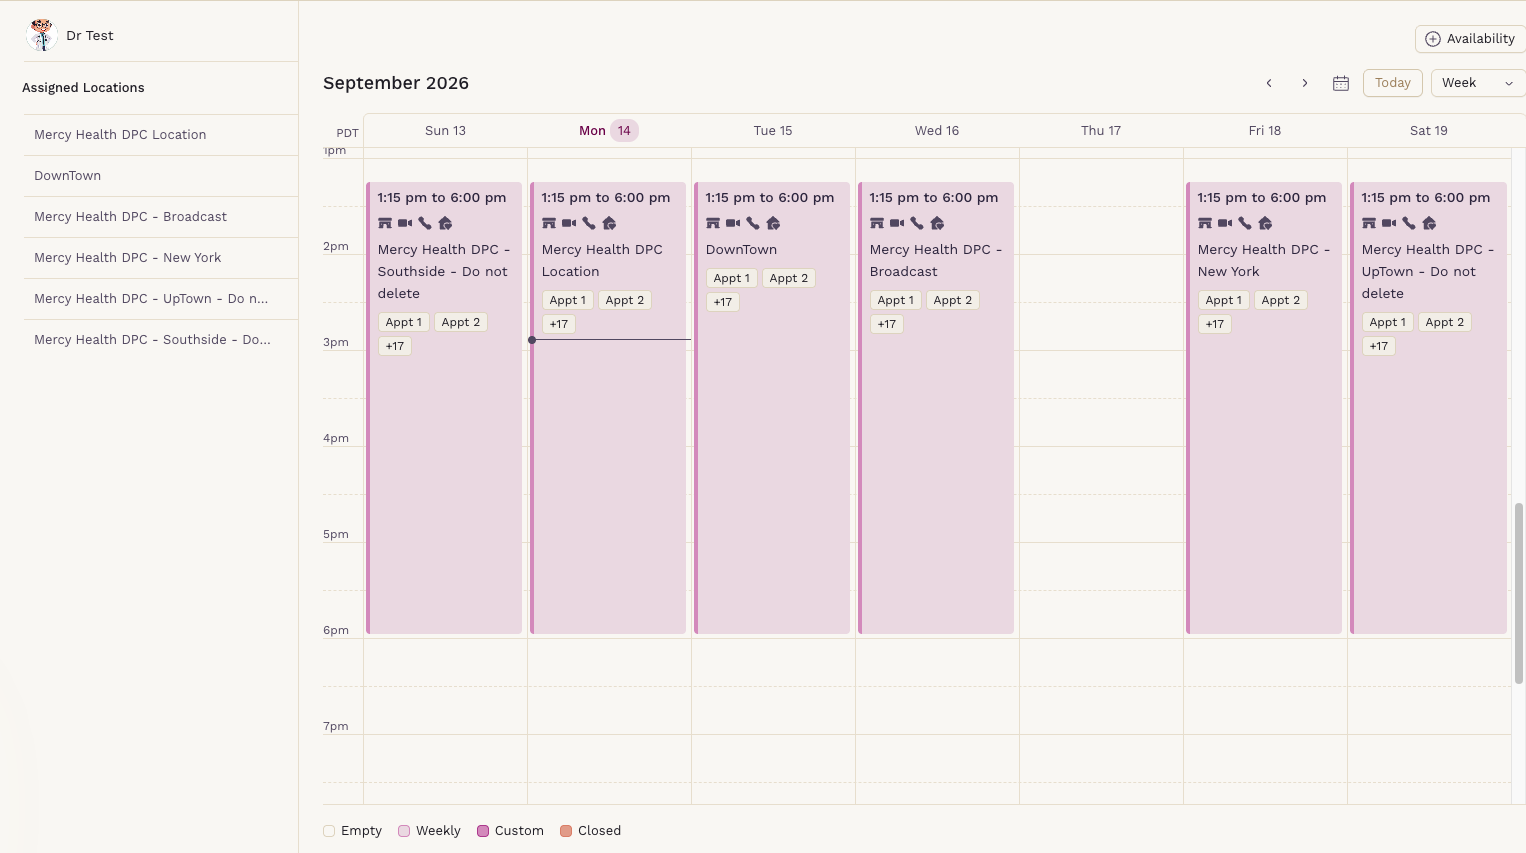
To define which appointments are available for a given day:
- Click Availability.
- Select the day, time, appointment types and visit methods available for that shift.
- Only those options configured in Appointment Settings will appear here.
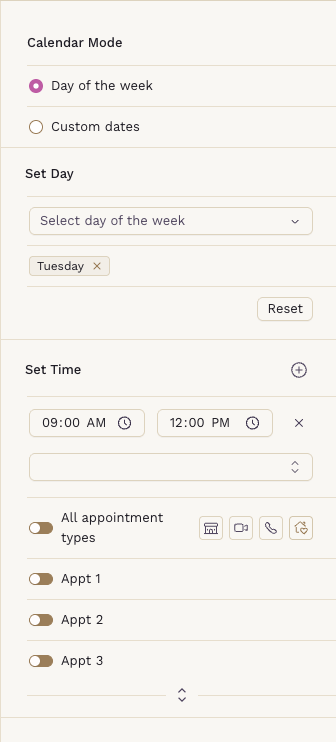
By configuring shifts, clinicians ensure that only the appropriate appointment times, types, and visit methods are made available for scheduling.
Calendar Management
From the Clinician Calendar, your team can view and manage upcoming visits in one place.
You can:
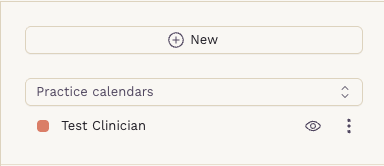
- Filter appointments by practice calendar, location (for multi-location practices), appointment type, status, or membership plan.

- Create new appointments manually:
-
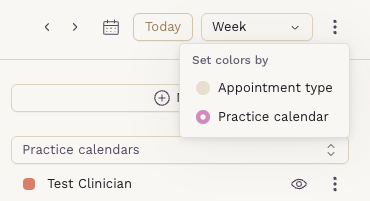
Color events by appointment type or by practice calendar, using Set colors by in the toolbar
-
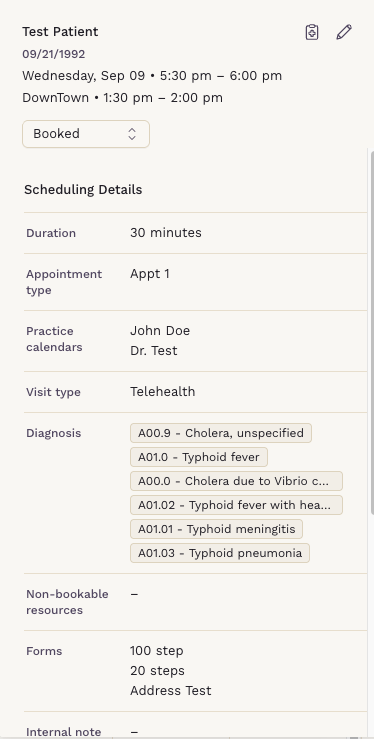
Click into appointments to view details, update status, or make changes
The calendar keeps your team aligned and your schedule running smoothly.
Patient Scheduling Settings and Notifications
In Practice Settings > Scheduling > Appointment settings, you can customize how patients manage and receive updates about their appointments.
-
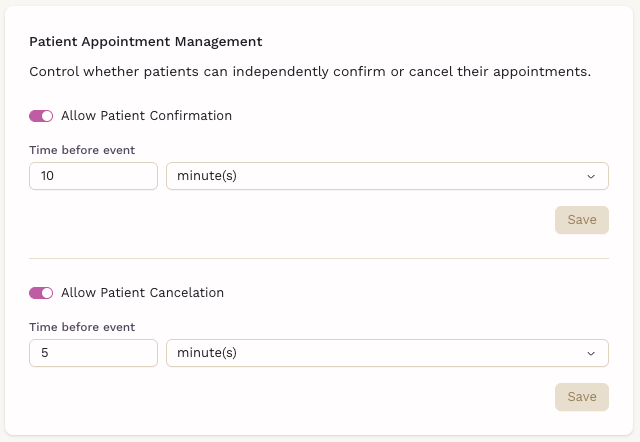
Enable or disable patient confirmations and cancellations
- Customize automated messages:
- Confirmation notifications
- Reminders per appointment
- Flexible timing options (minutes, hours, or days)
-
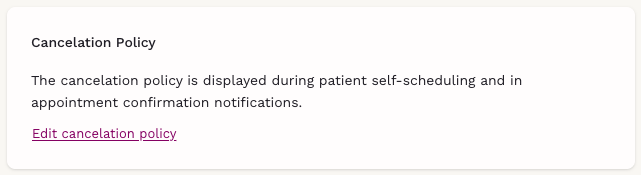
Edit your cancellation policy, which appears during self-booking and in confirmation emails
These tools help reduce no-shows and keep patients informed every step of the way.