
How to Attach a Membership to a Patient
Attaching a membership to a patient in SigmaMD is a straightforward process. Follow these steps to ensure the membership is correctly linked to the patient’s chart.
Step 1: Ensure the Membership Plan is Created
Before attaching a membership to a patient, make sure the membership plan has already been set up in SigmaMD.
Step 2: Access the Patient’s Payments
- Navigate to the Patient List screen.
- Search for the patient using their name, date of birth, phone number, or email.
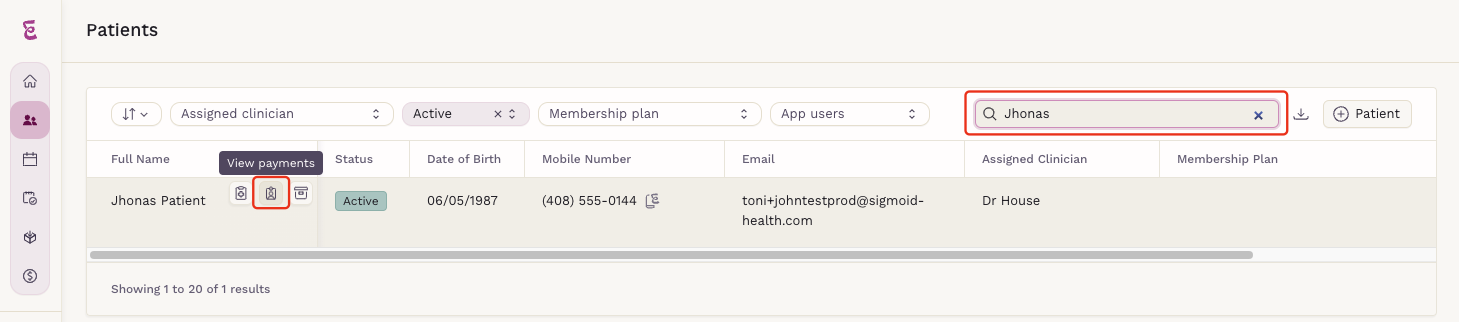
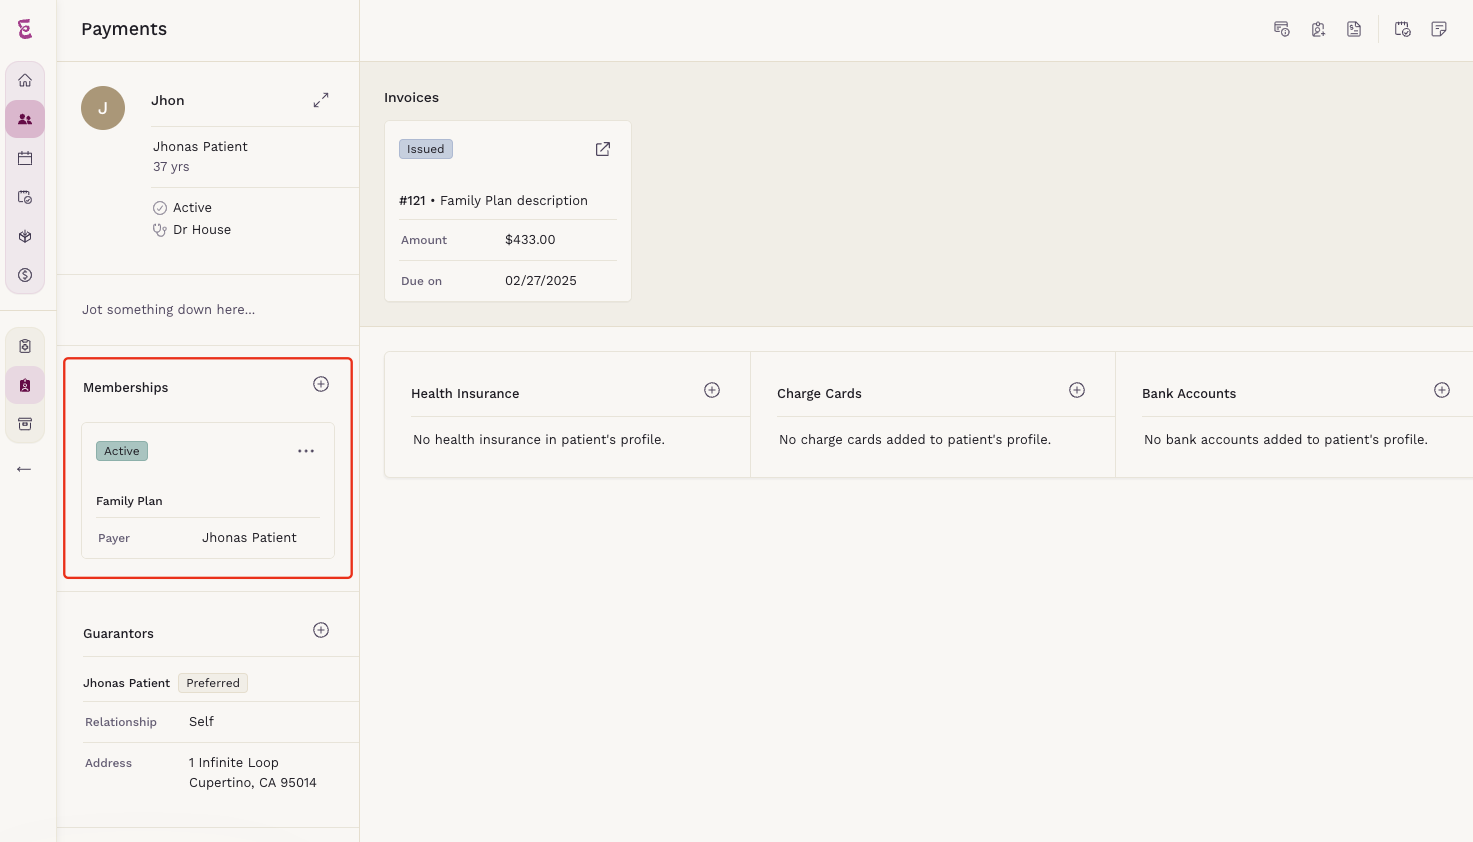
Step 3: Go to the Memberships Section
Inside the patient’s payment screen, locate the Memberships section. Click Add Membership Plan.

Step 4: Select the Membership Plan and Build the Enrollment
- Choose the membership plan that best fits the patient's needs (searchable by name).
- Configure the enrollment details:
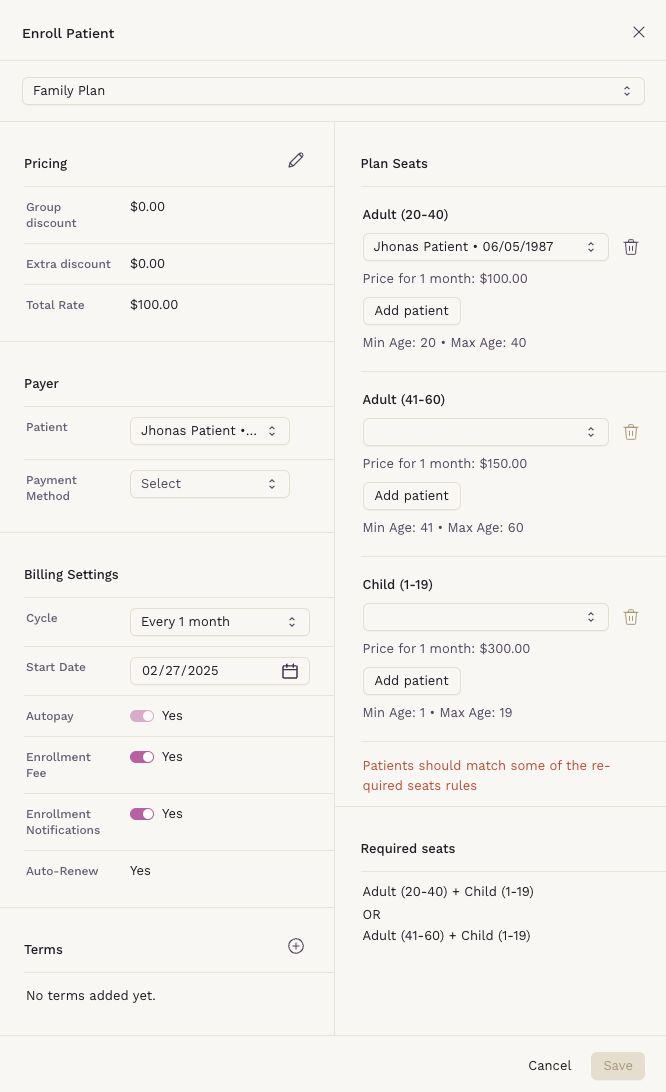
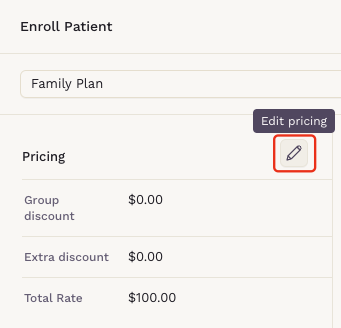
Pricing Options
- Group Discount: Automatically applies if configured in the membership plan.
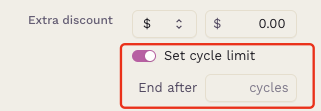
- Extra Discount: Click Edit Pricing to manually enter an additional discount (% or $ amount).
- Cycle Limit: Enable and set the number of cycles, if applicable. Once the specified cycles are completed, the extra discount will no longer apply.
- Total Rate: Displays the current total for enrollment and updates with any changes.
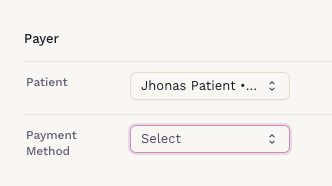
Payer Information
- Payer: The patient is selected by default but can be changed if someone else will be paying.
- Payment Method: Choose from Cash, Check, ACH, or Credit Card.
- ACH & Credit Card options appear only if these payment methods have been added in the patient’s payment screen.
- If a preferred payment method exists, it will auto-fill.
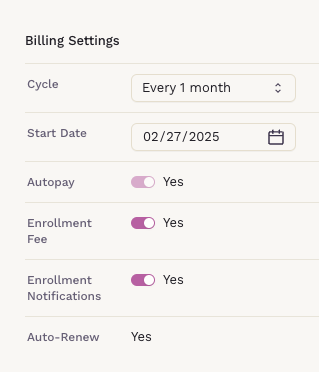
Billing Settings
- Cycle: Choose from available billing cycles.
- Start Date: Select today’s date or a future date (for deferred memberships).
- Autopay: Available for ACH or Credit Card payments, enabling automatic payments.
- Enrollment Fee: Enable to apply the pre-set enrollment fee or disable to waive it.
- Enrollment Notifications: Enable to notify patients via Email and SMS.
- Auto-Renew: Display-only field based on membership settings (renews automatically if set to "Yes").
Terms
- Upload Terms: Attach membership terms directly within the enrollment.

Plan Seats
- Plan Seats: Displayed based on membership plan configuration. Fill in one or multiple seats according to plan rules.
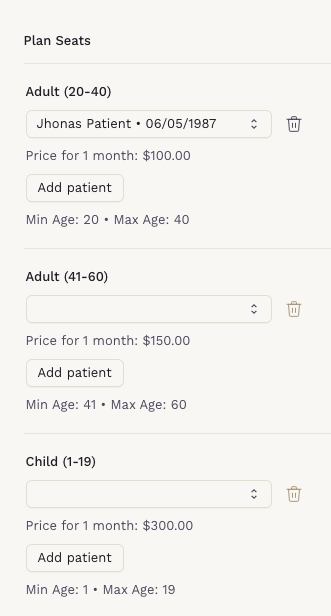
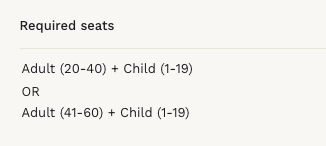
- Required Seats: These must be occupied to enable the Save button.
Step 5: Save the Membership
Click Save to finalize the membership attachment to the patient.
Step 6: Verify the Membership
After saving, review the patient’s chart to ensure the membership has been successfully linked.
Following these steps ensures seamless membership enrollment within SigmaMD. If you need further assistance, contact our support team.